Add Domain to Resend
First, log in to your Resend Account and add a domain.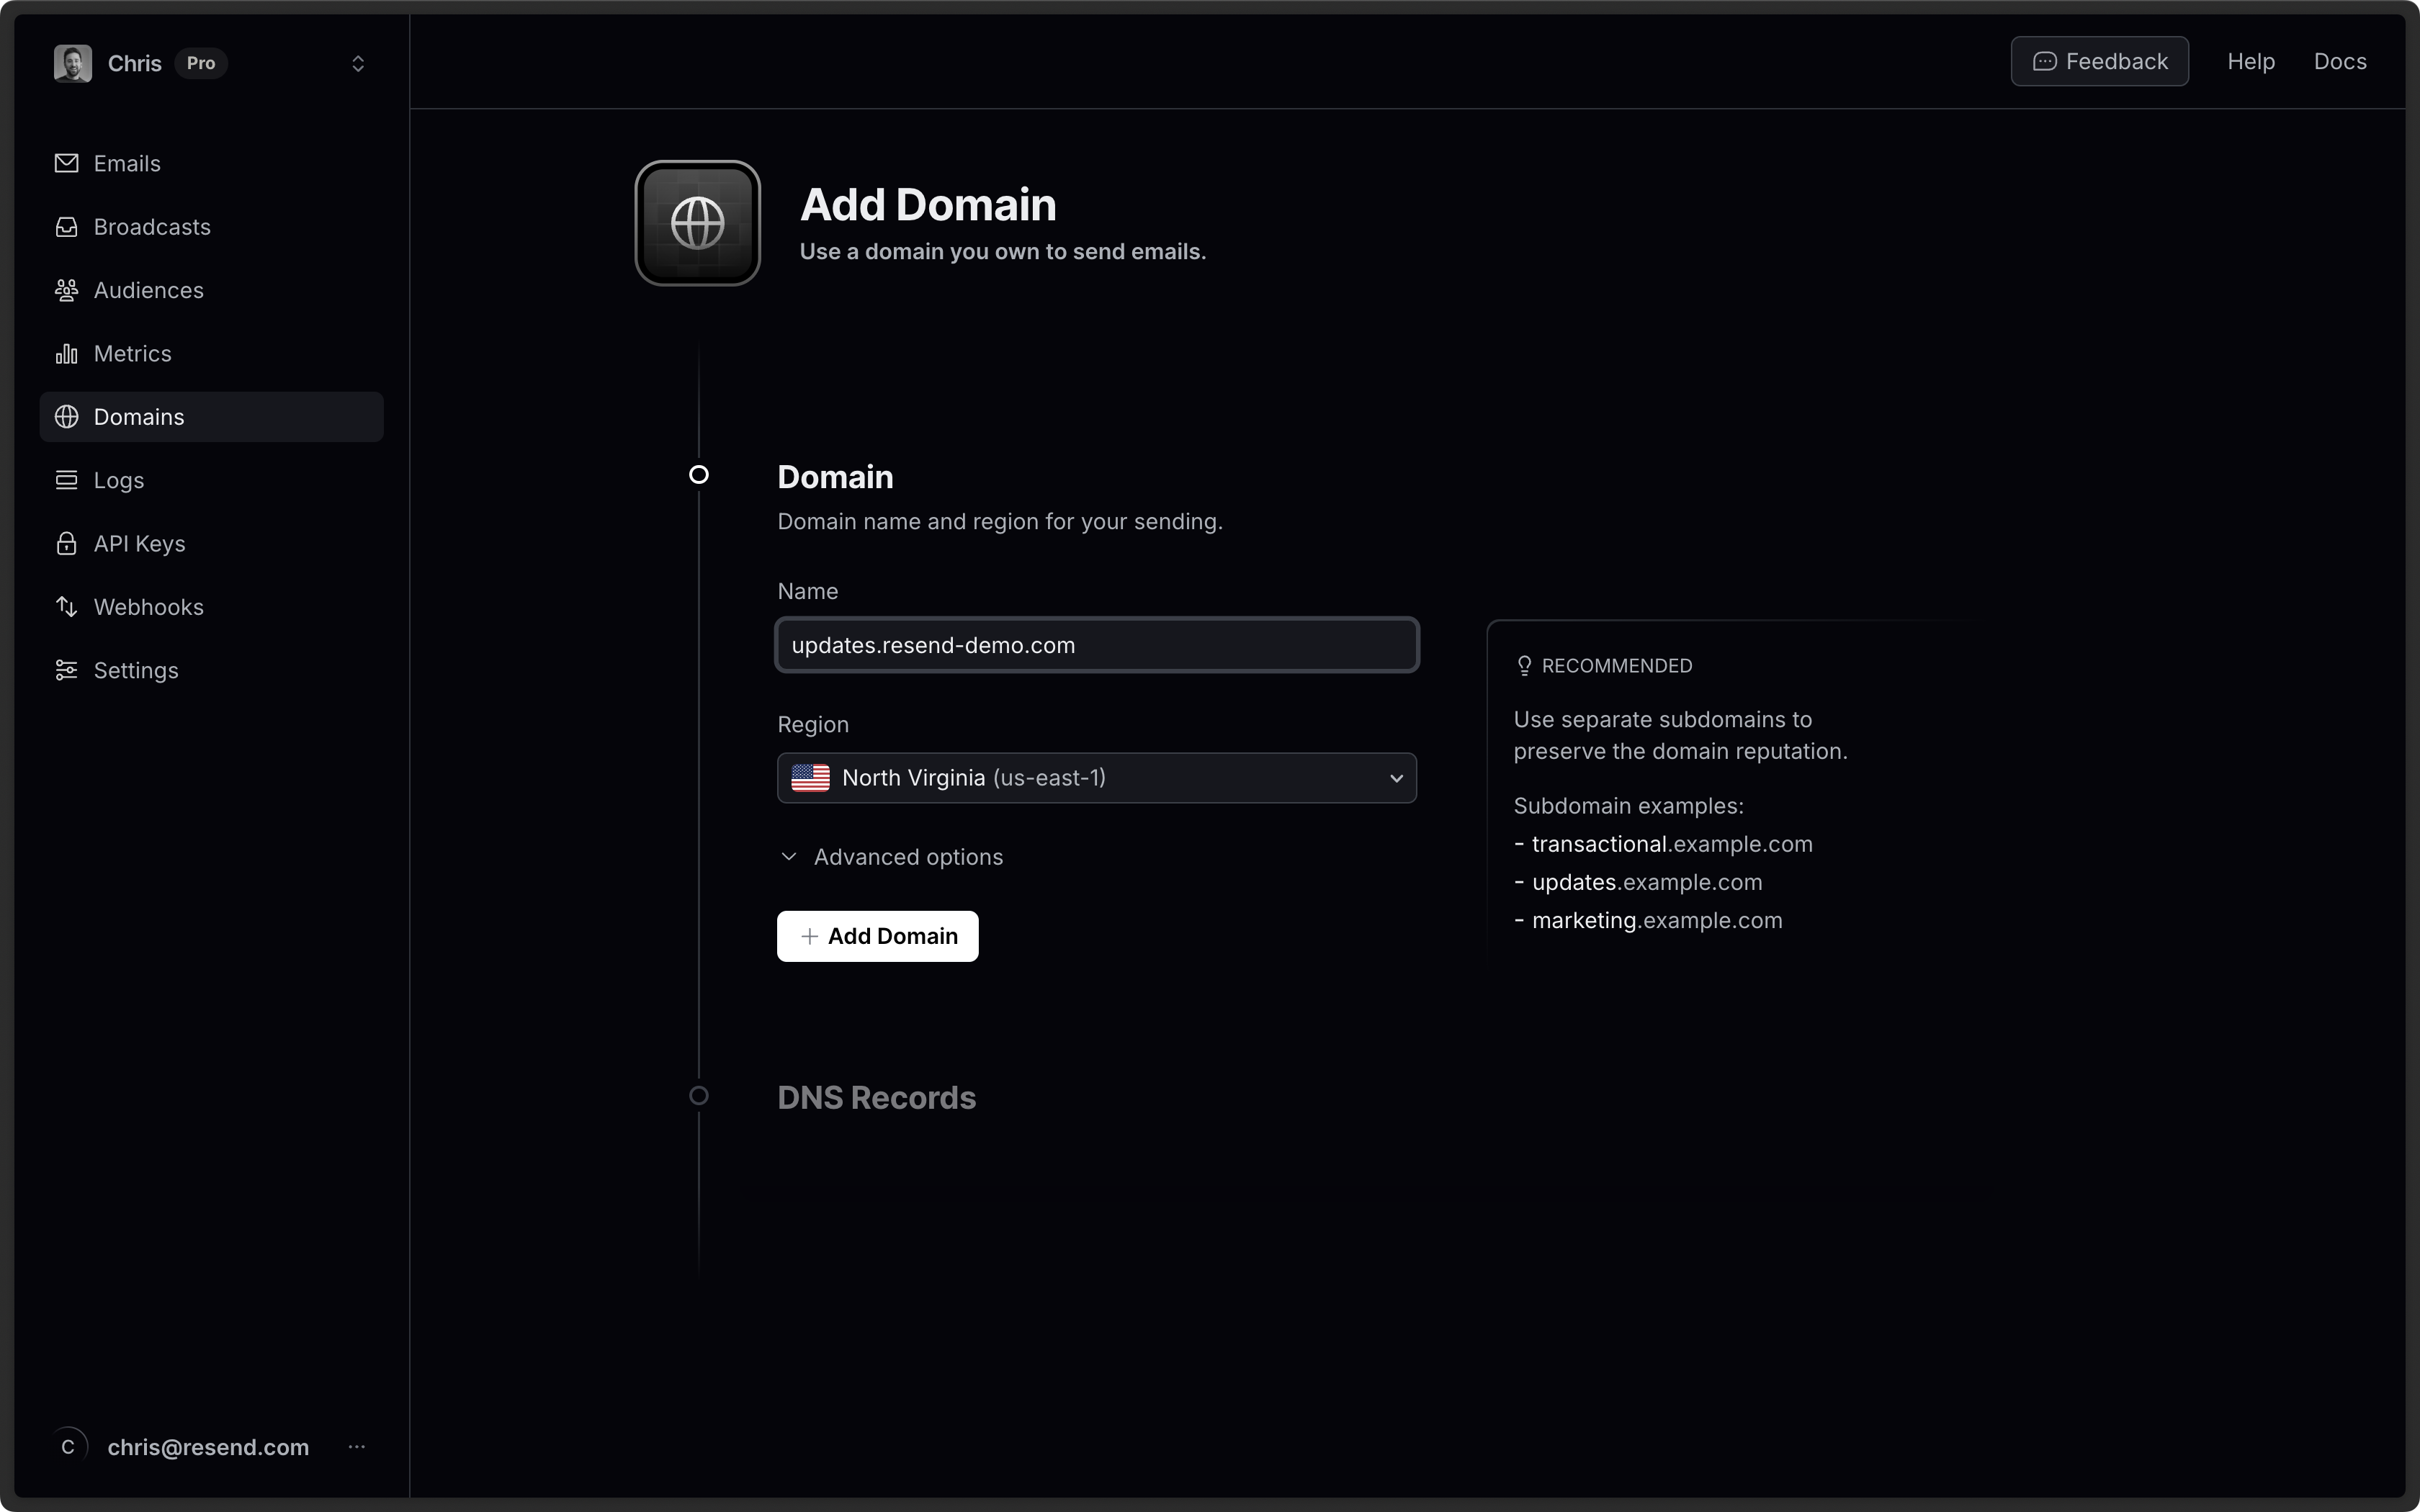
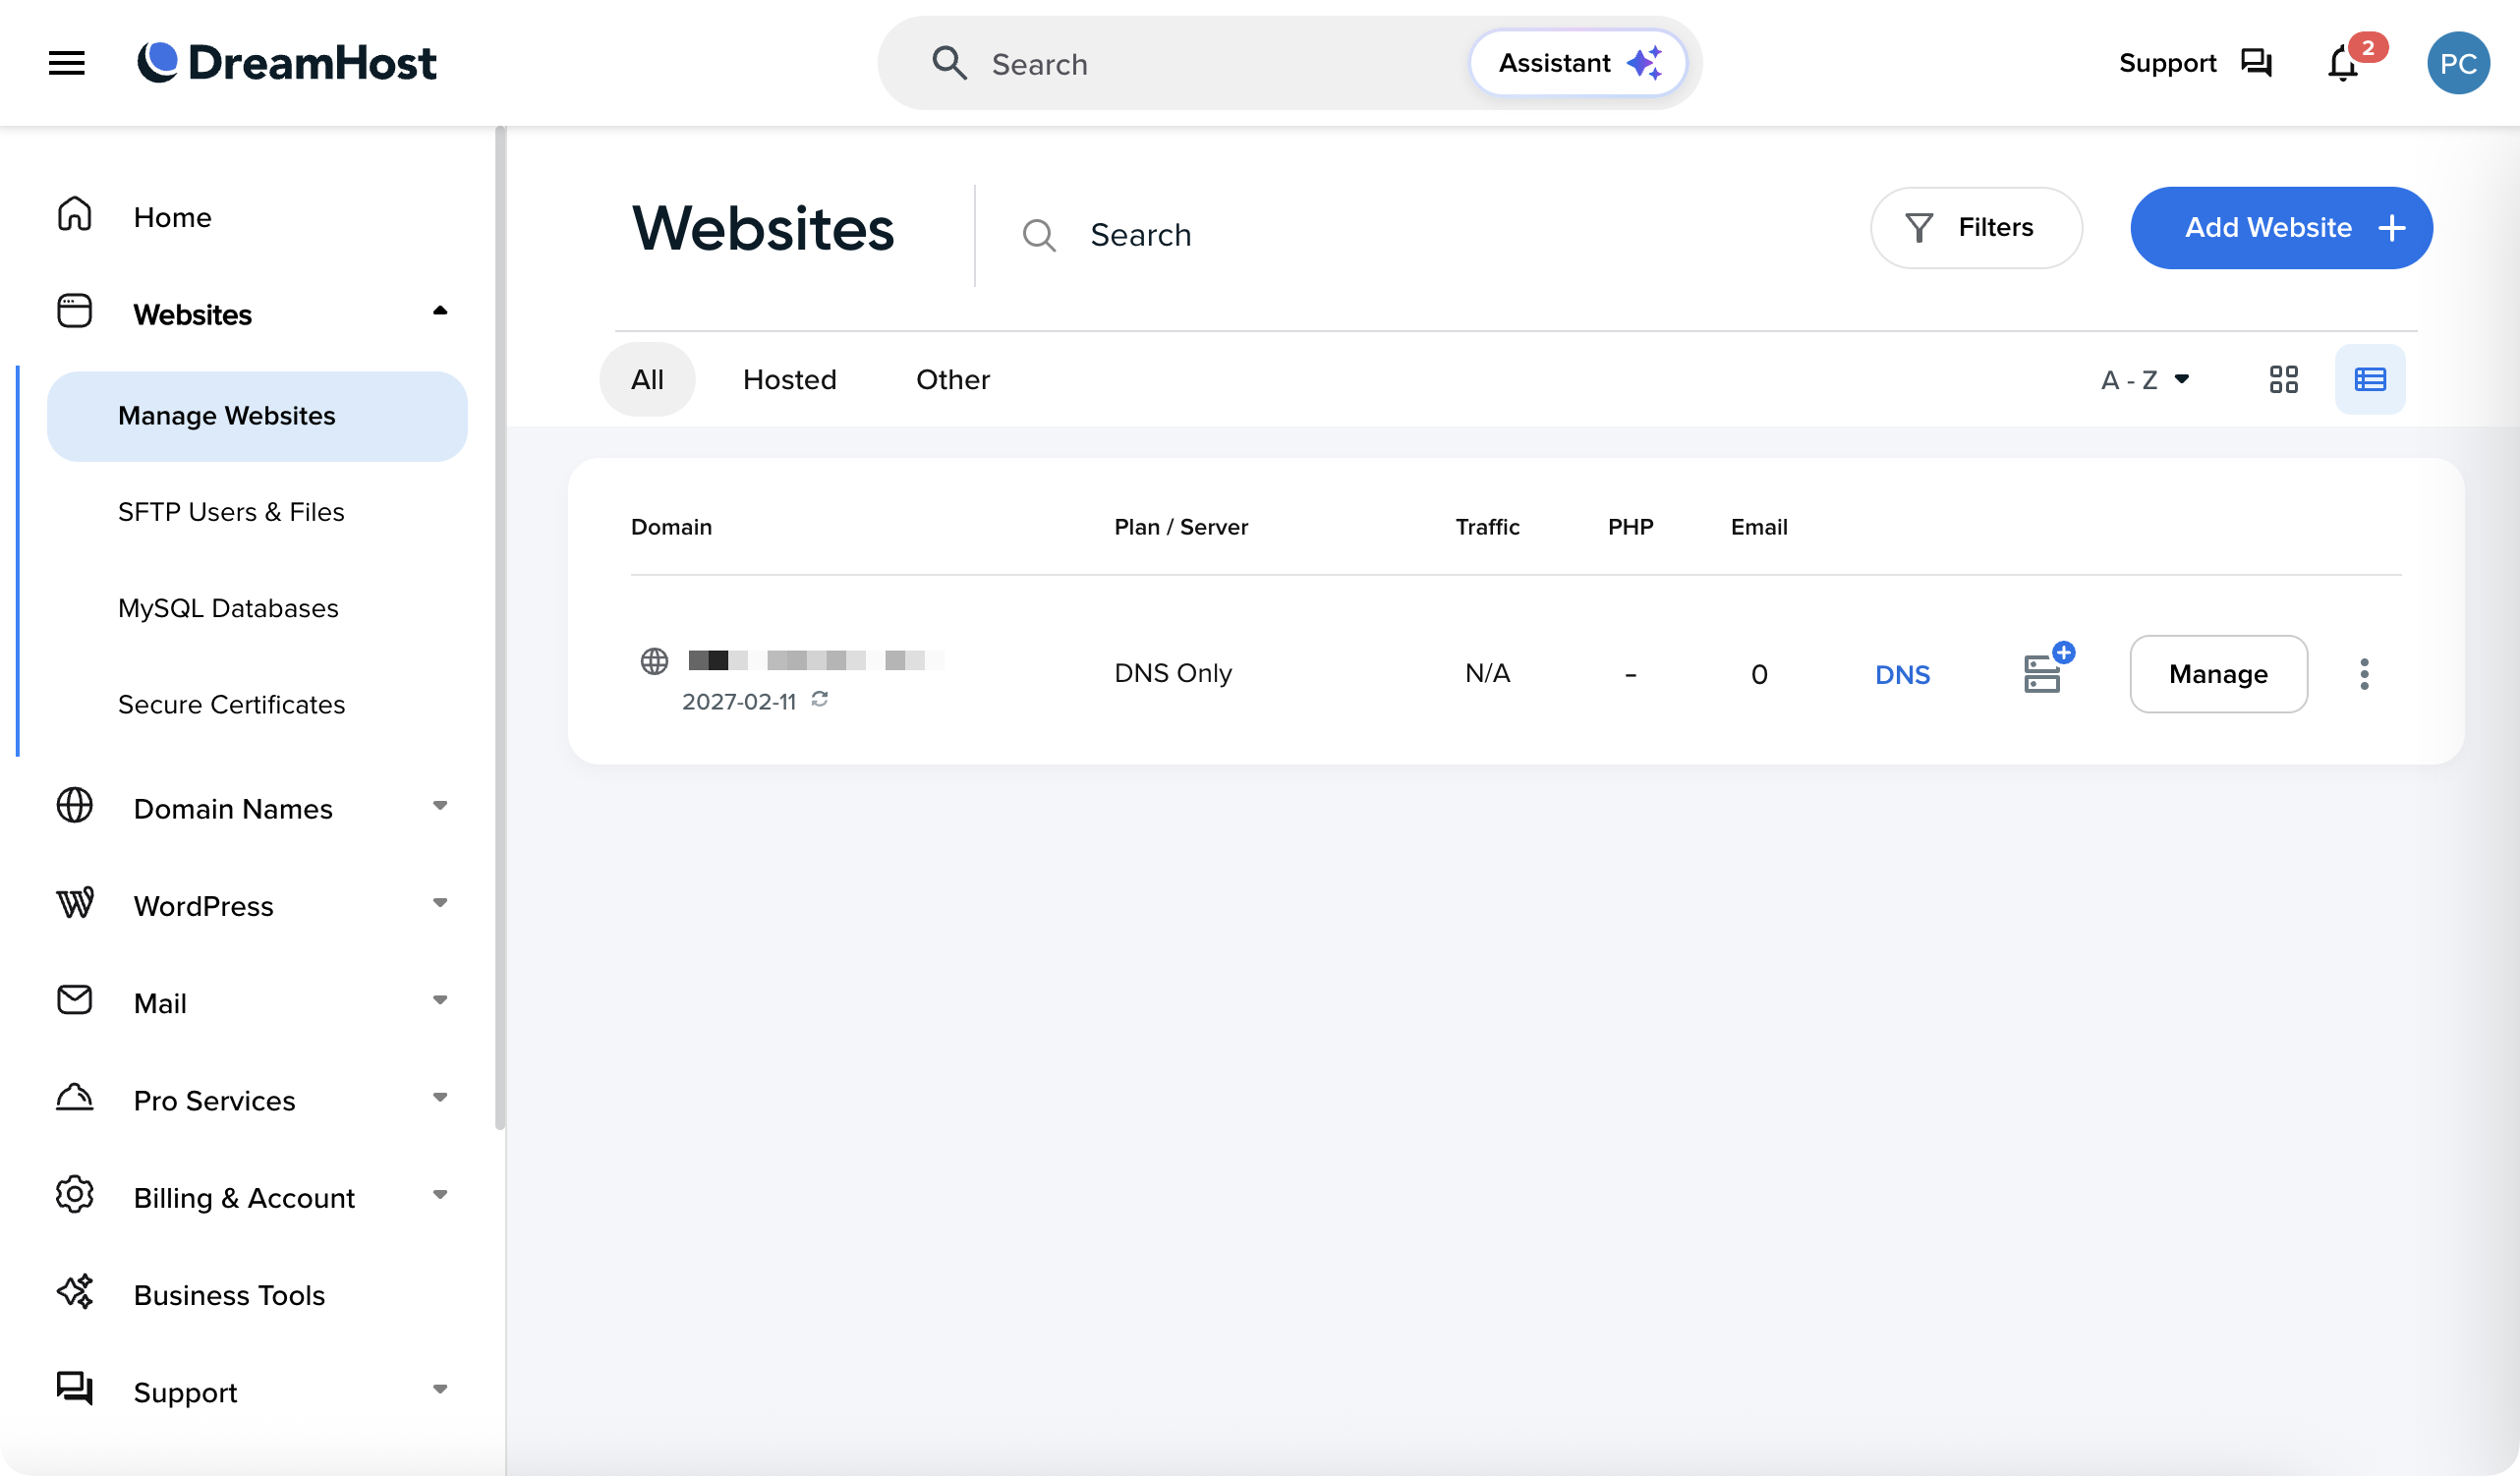
Log in to DreamHost
- Log in to your DreamHost panel.
- Go to Websites > Manage Websites.
-
Select Manage on the domain you want to verify.
Add TXT SPF Record
- Navigate to the DNS tab.
- Enter
sendas Host. - Enter
v=spf1 include:amazonses.com ~allas TXT Value. - Click Add Record.

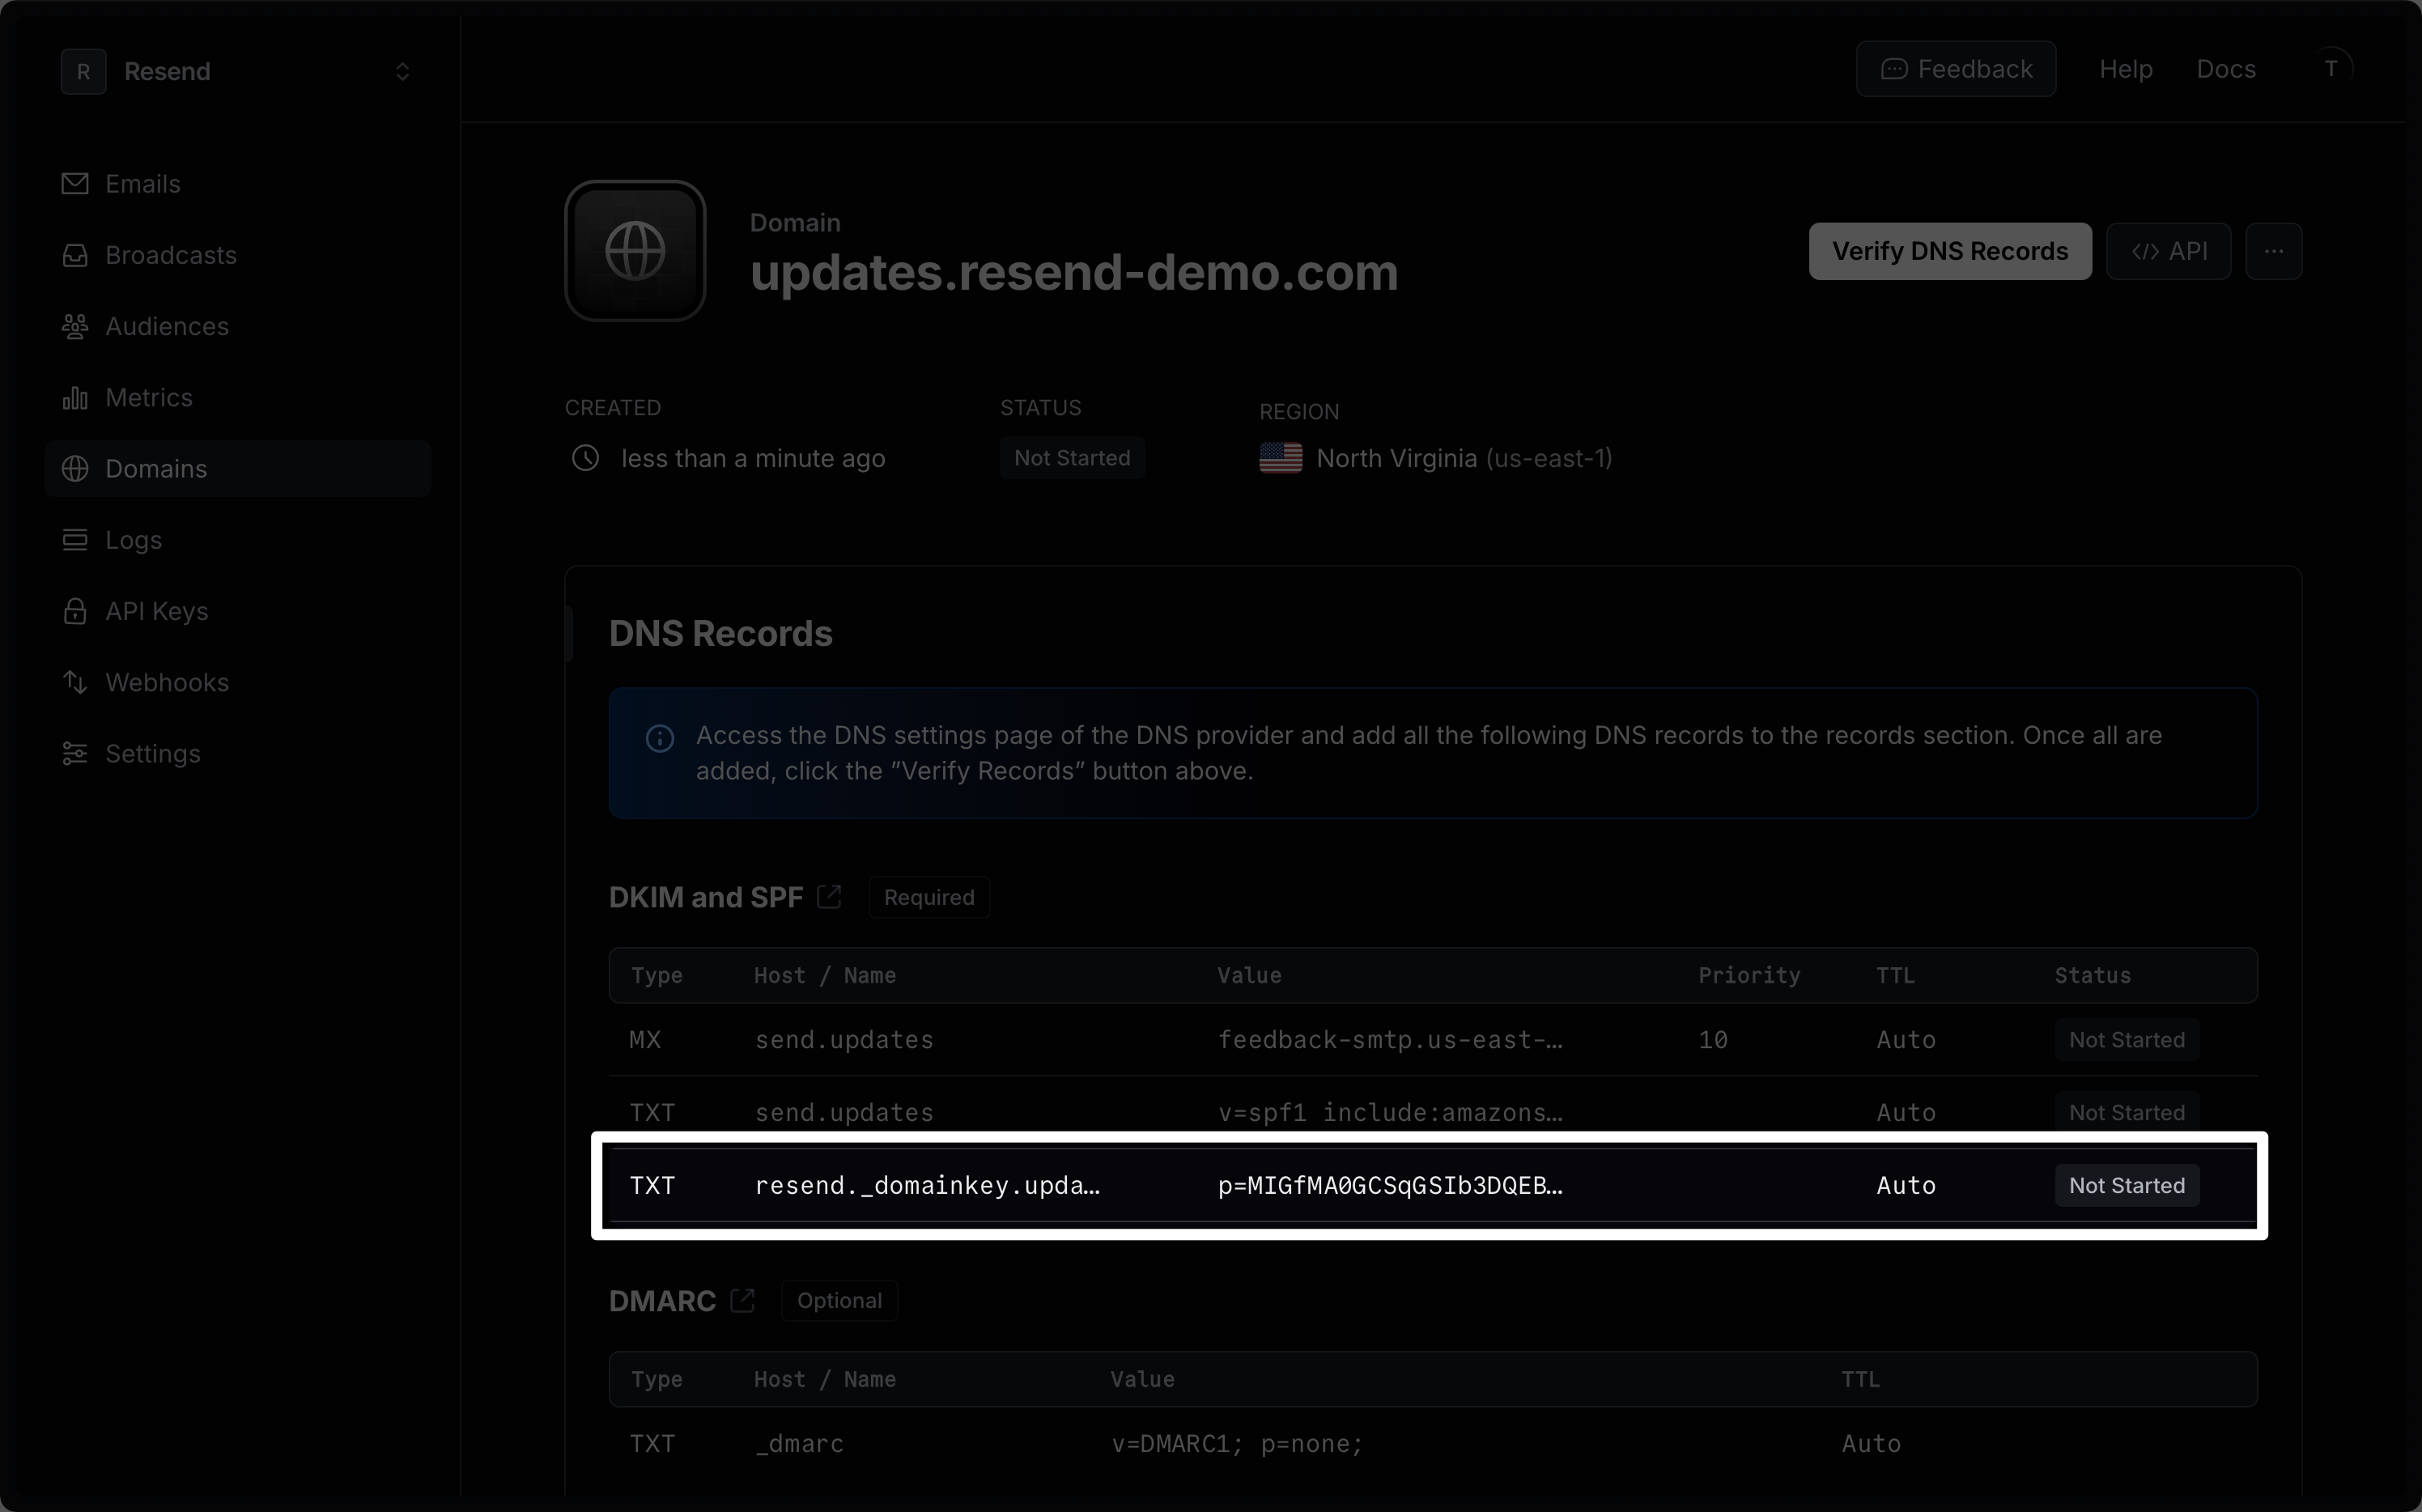
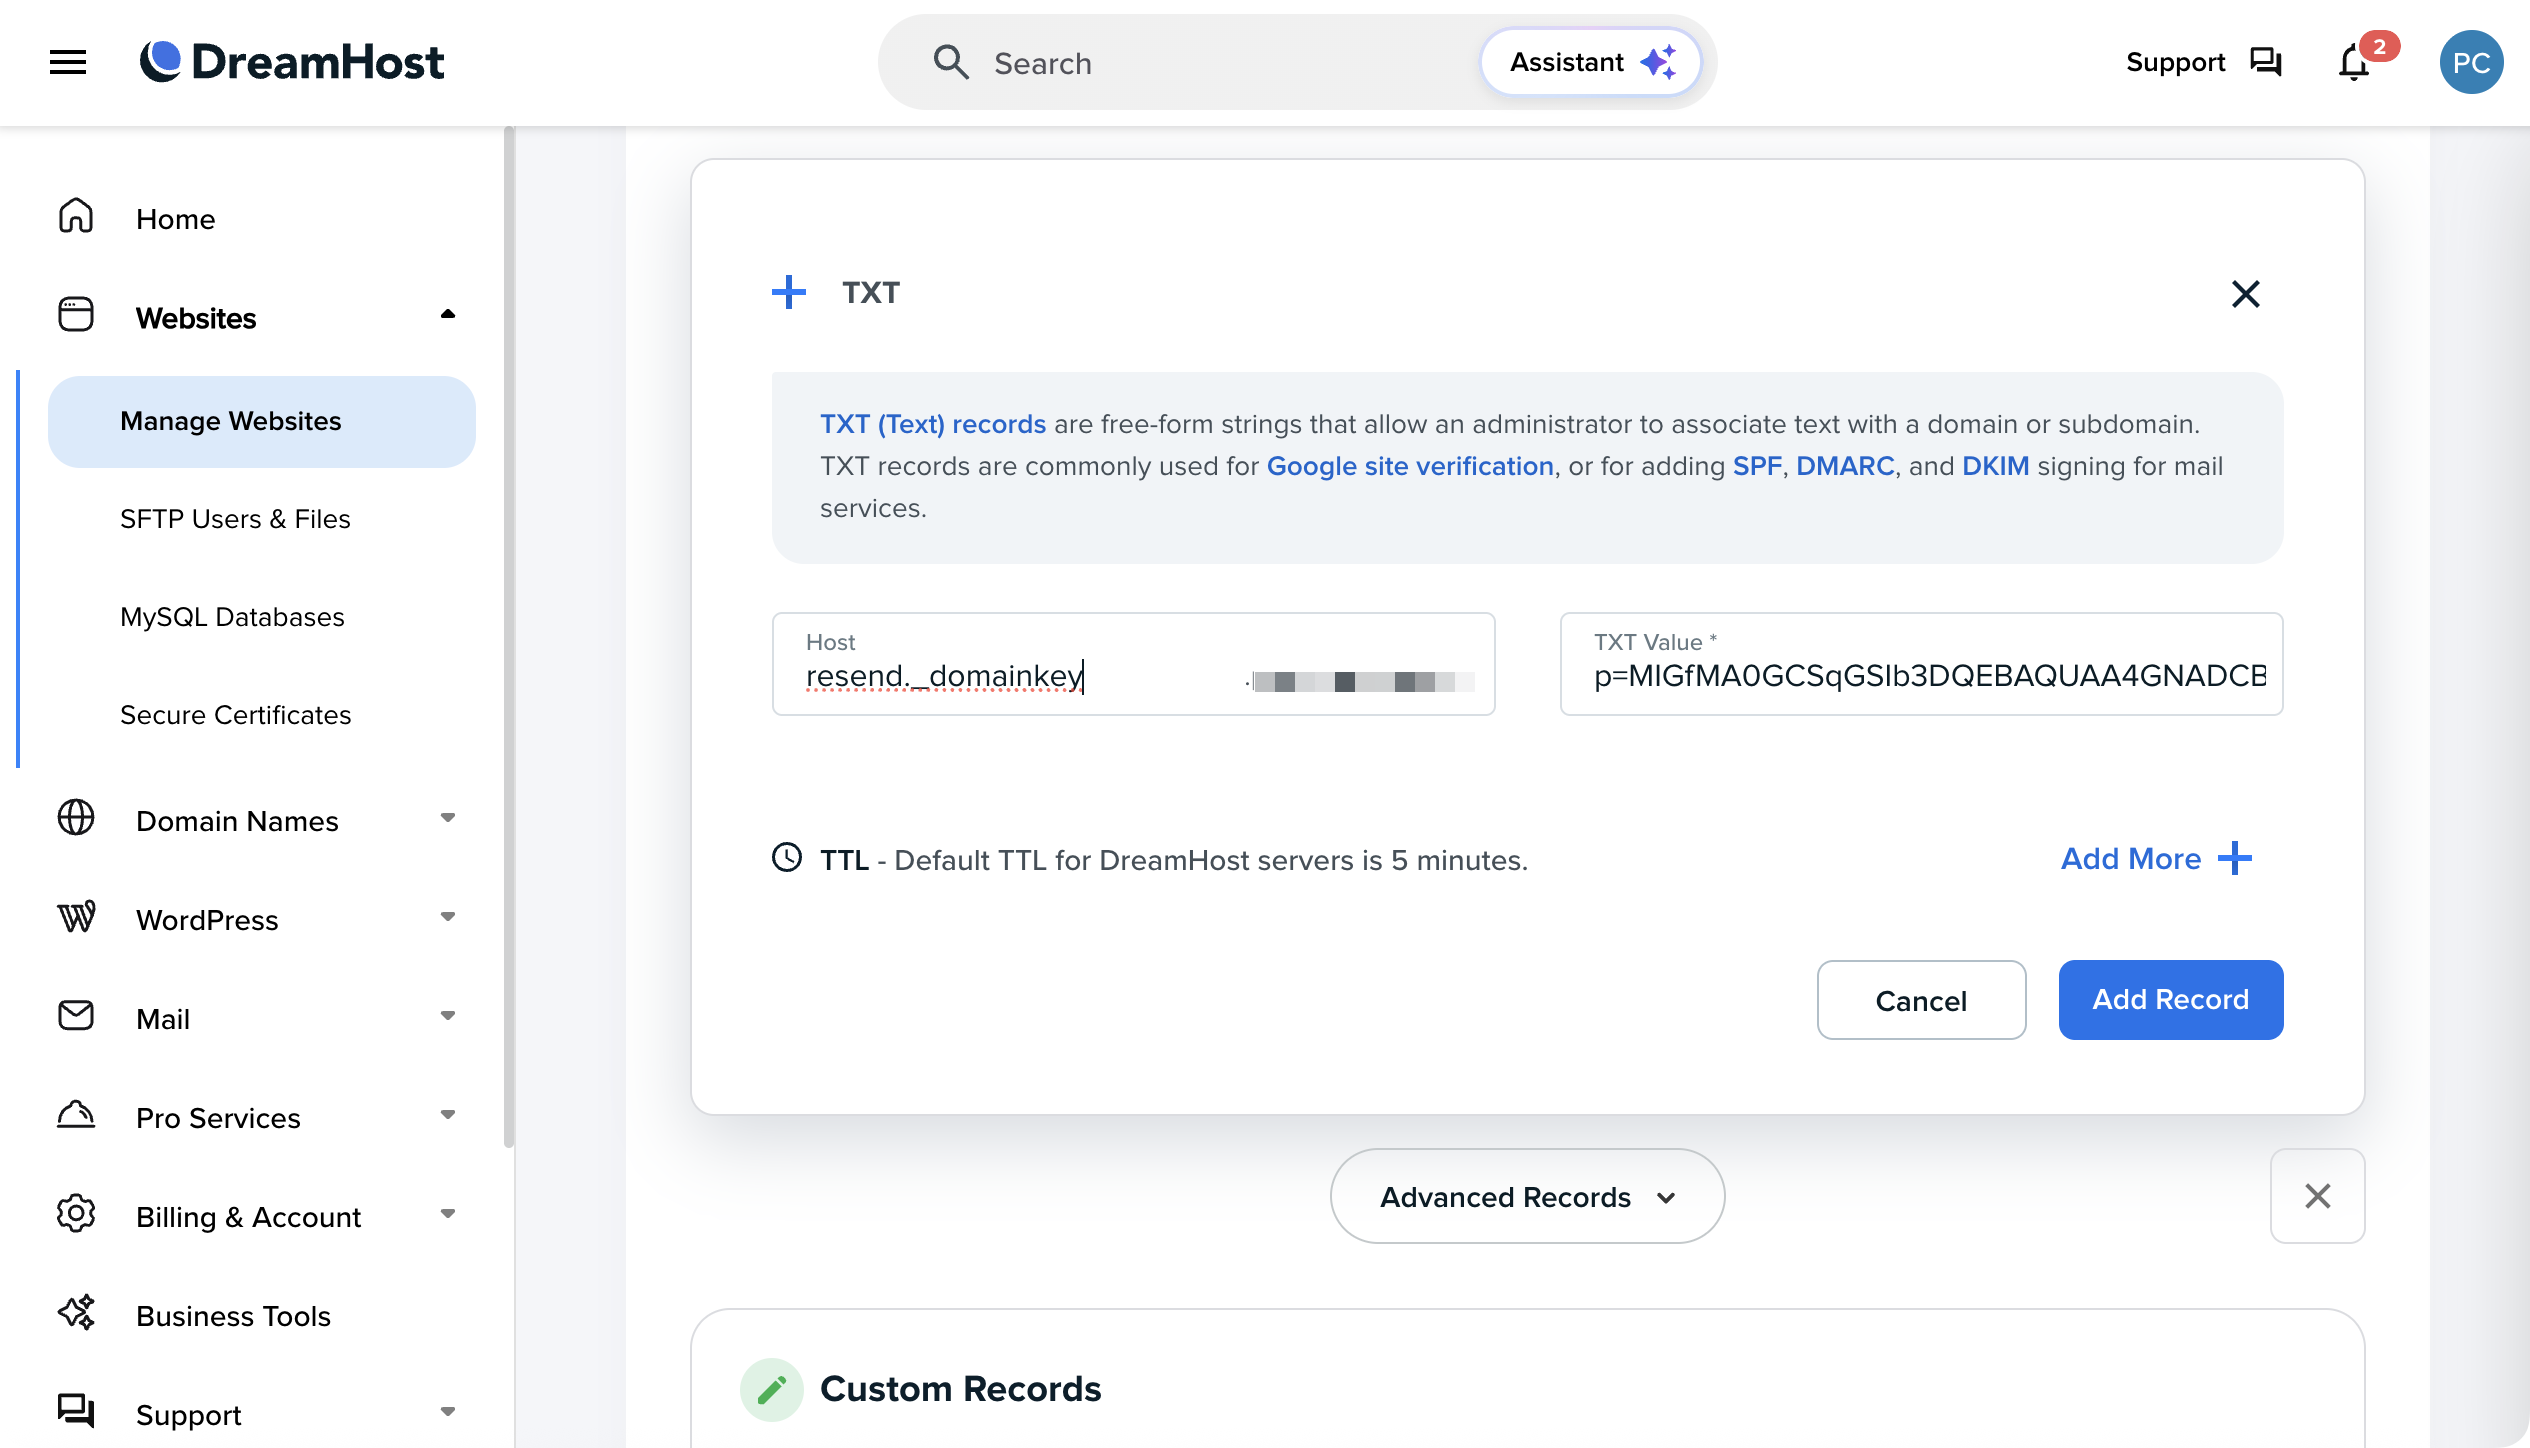
Add TXT DKIM Records
- In the same window, add another TXT record.
-
Add
resend._domainkeyas Host. -
Copy the value from your domain configuration page in Resend and paste it into DreamHost.
-
Click Add Record.
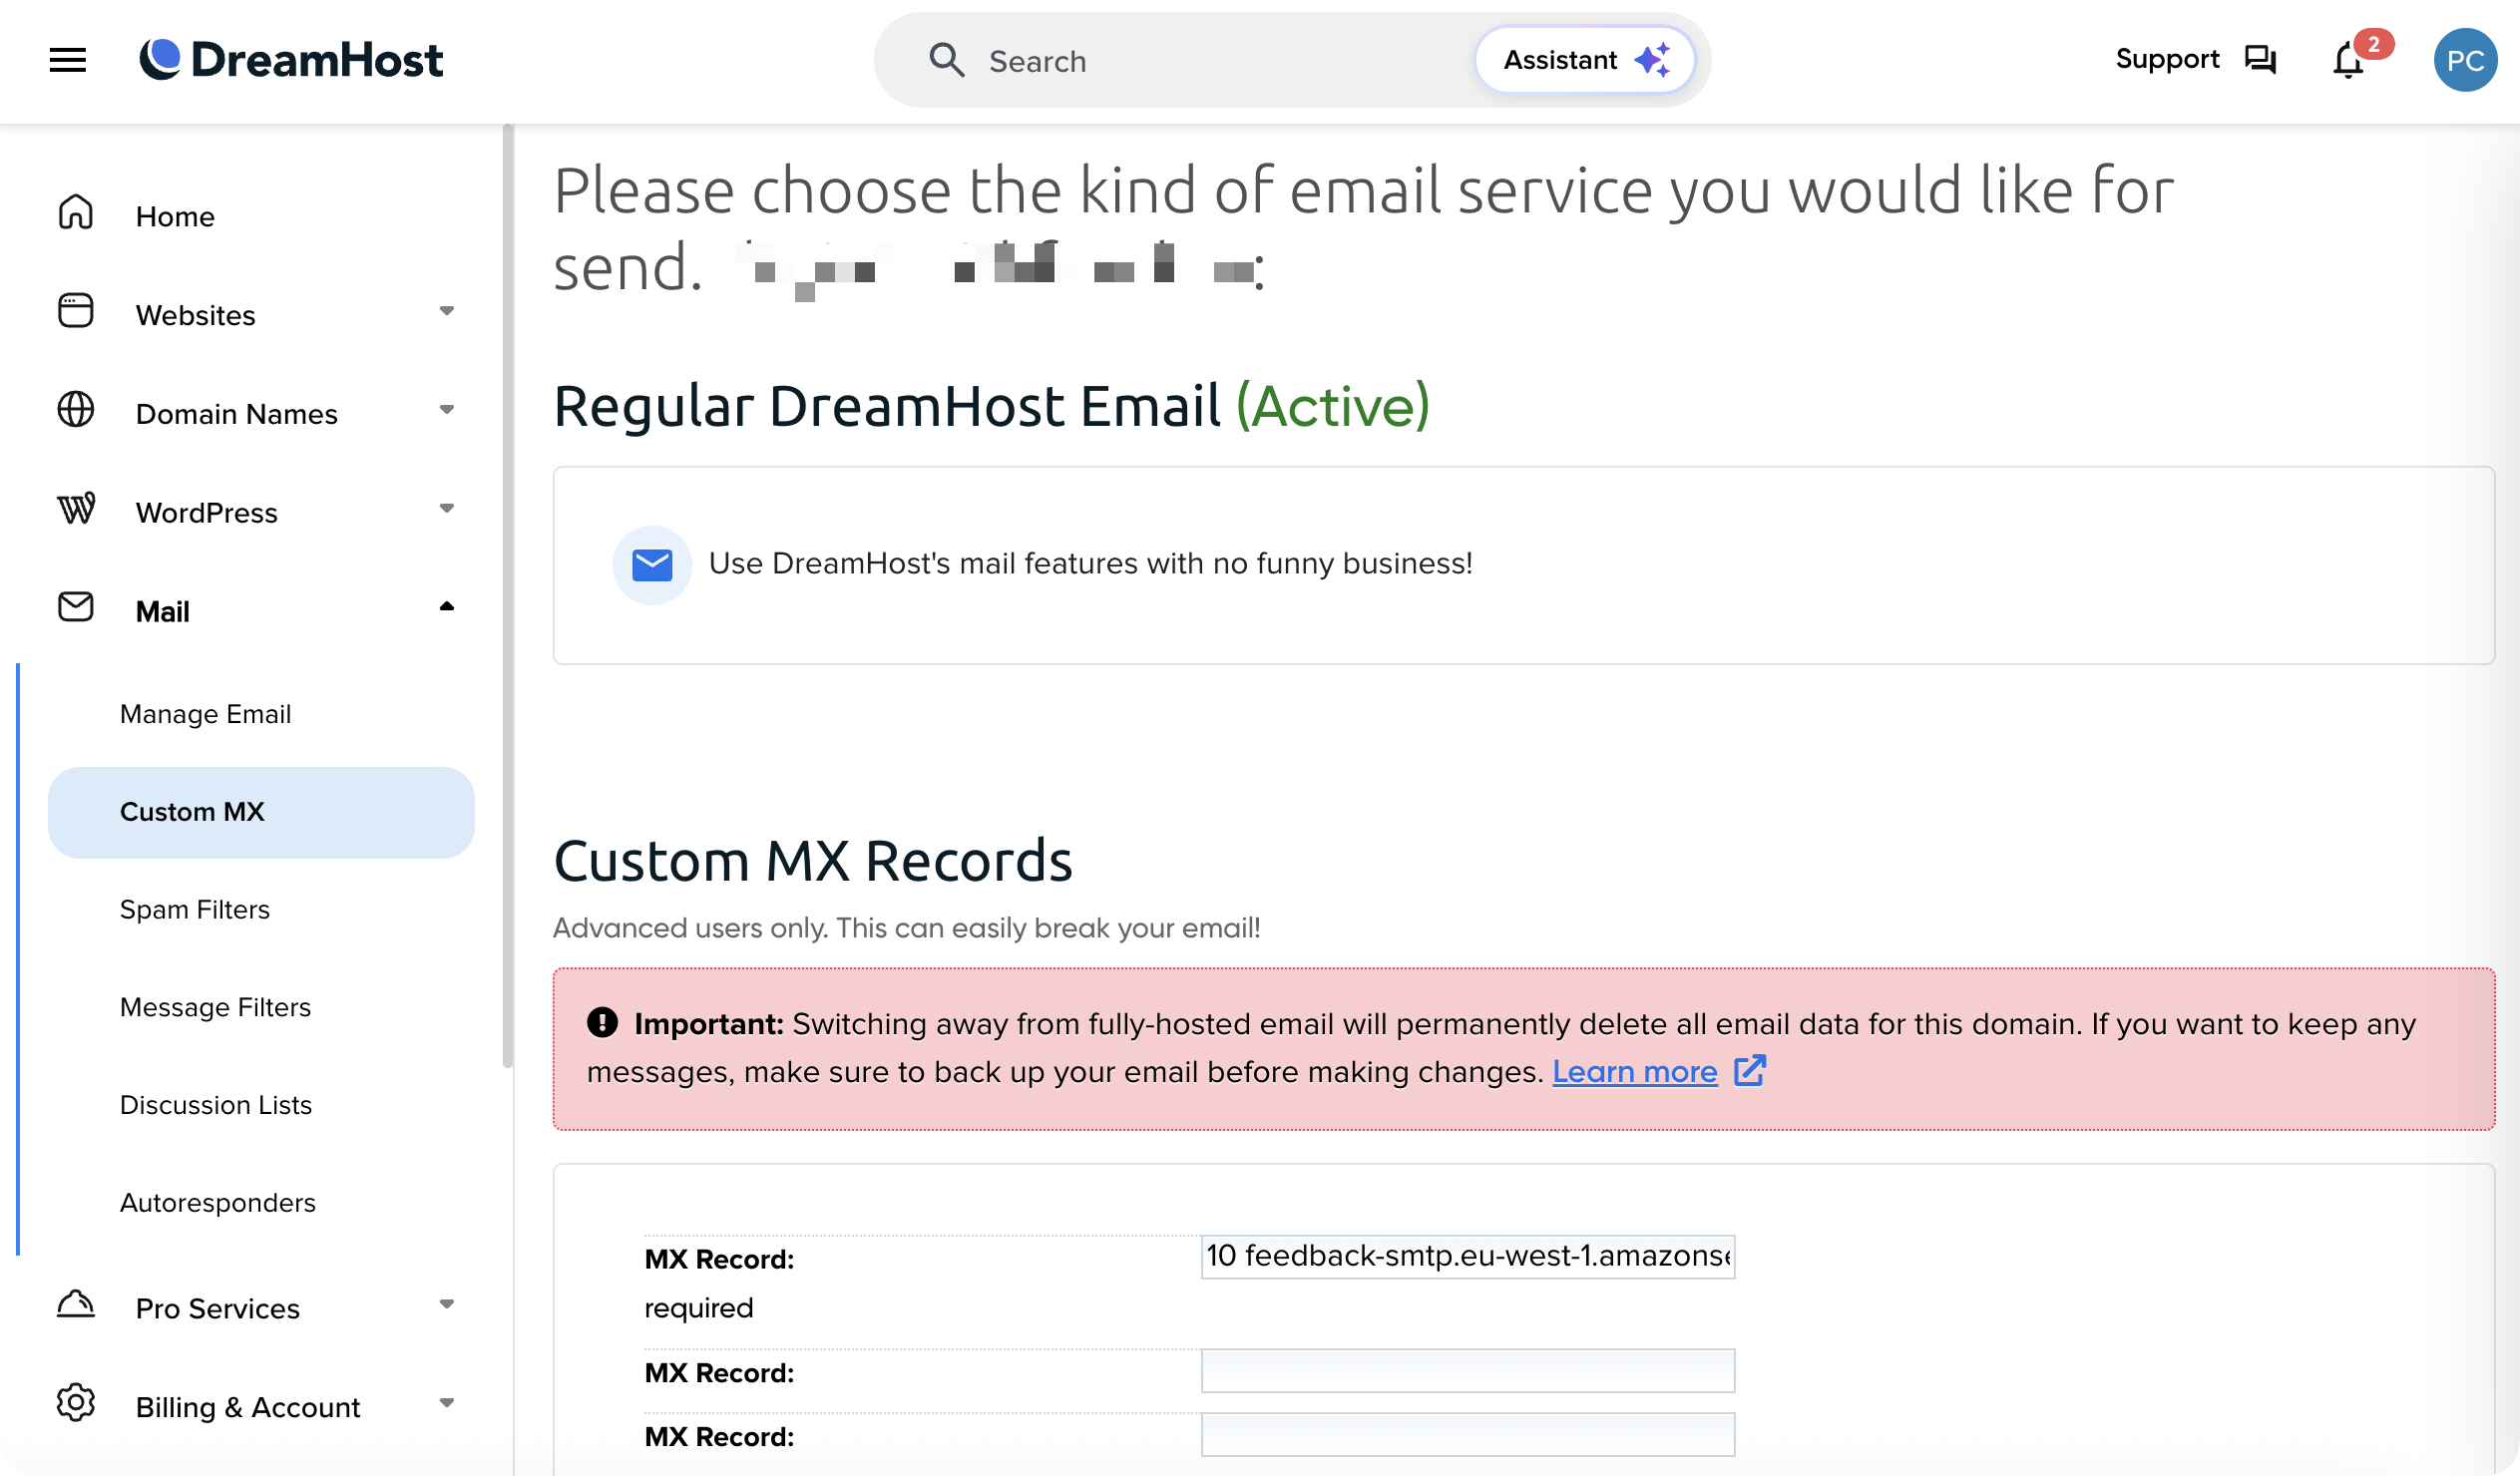
Add MX SPF Record
- Create a subdomain with the custom path name. Return to Manage Websites page. Click Add Website.
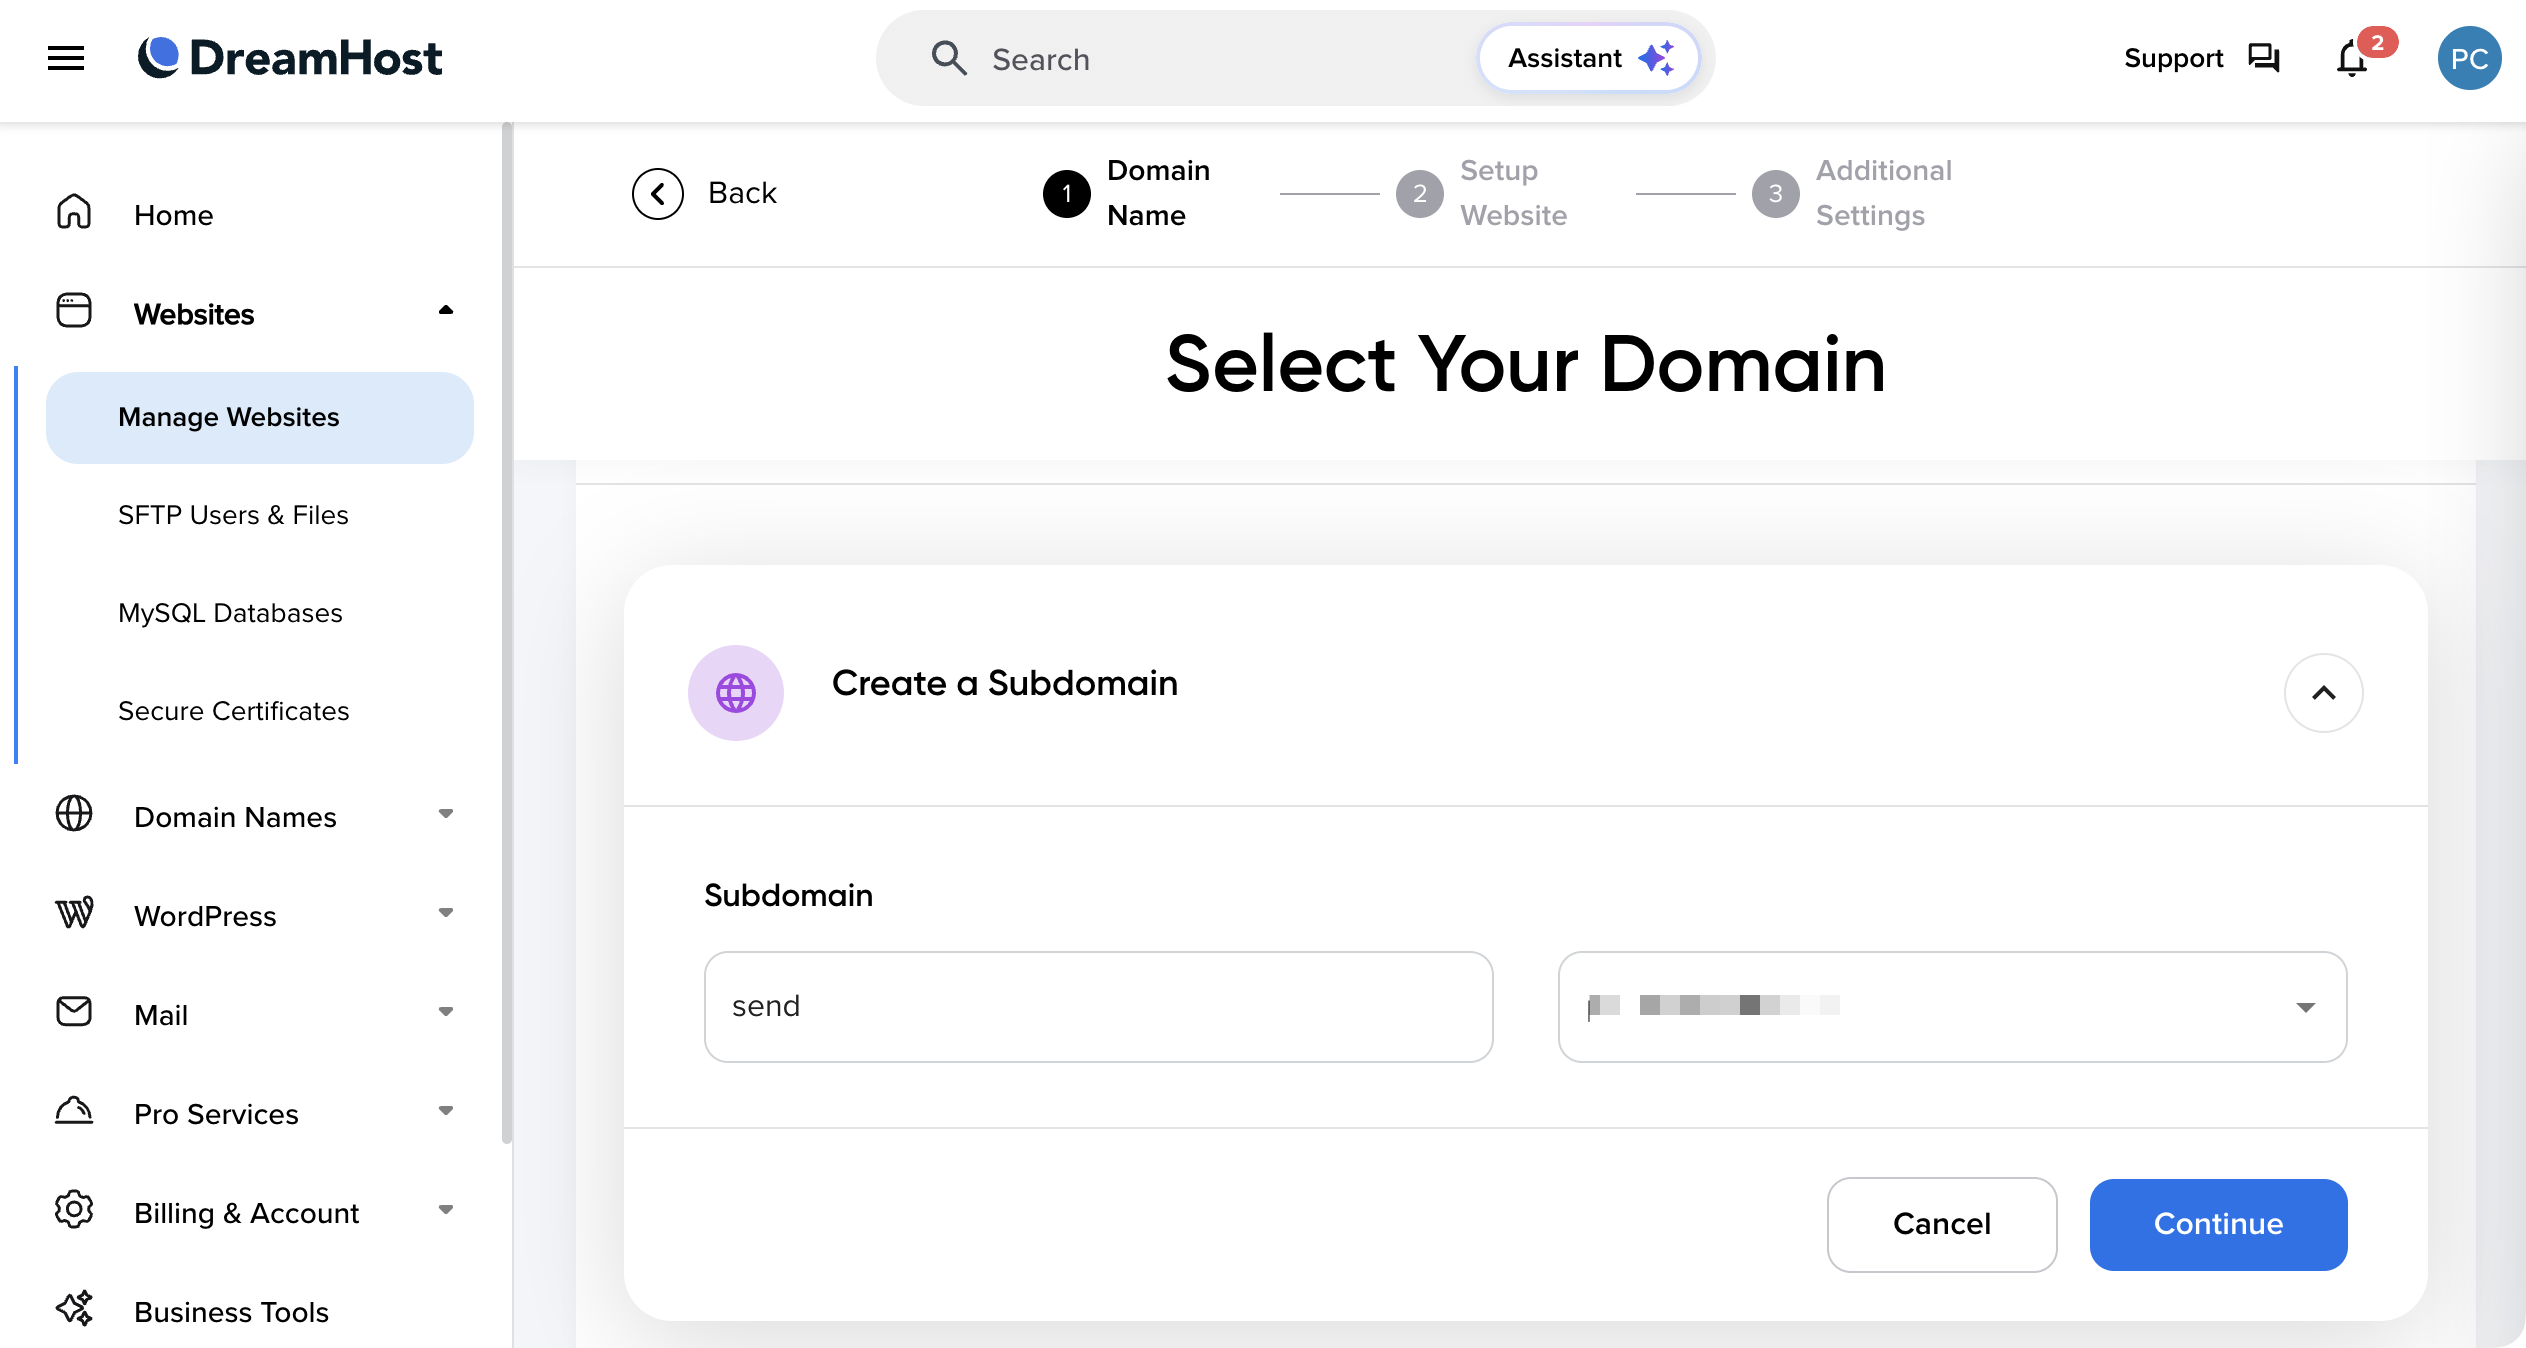
- Click Manage on the subdomain.
- Add Record > Select MX > Manage Customer MX.
- Copy and paste the MX value replacing the default record.
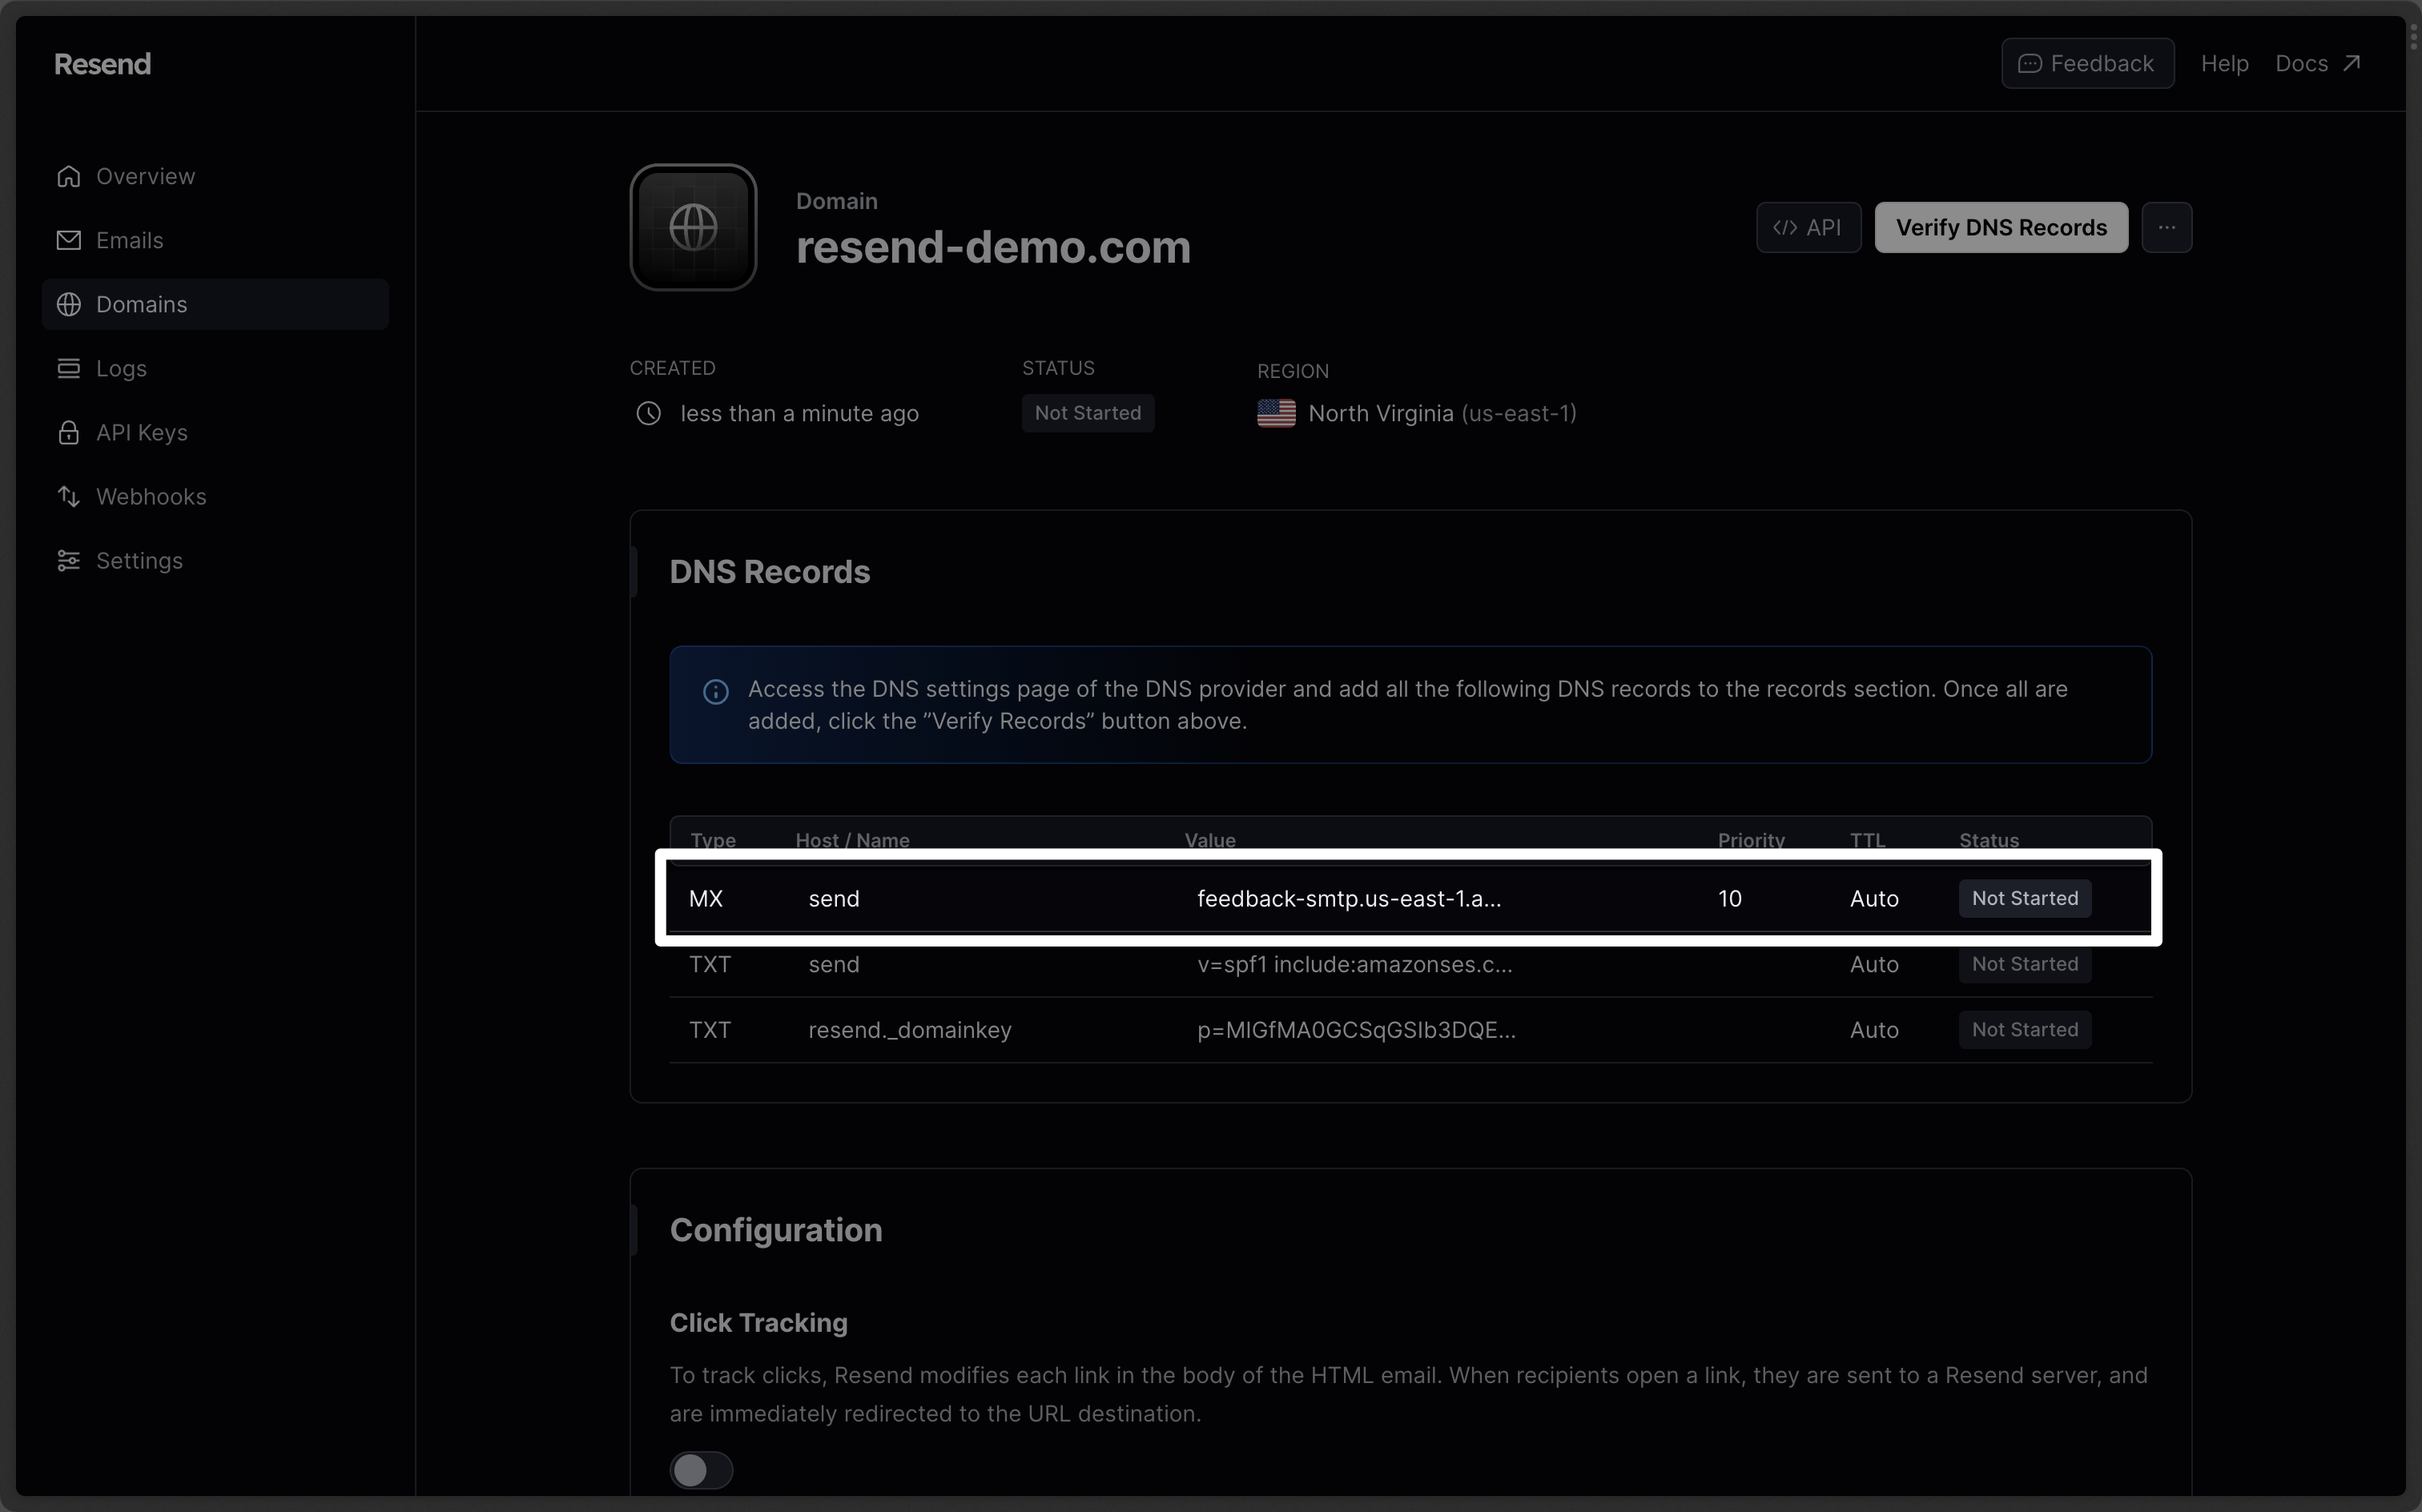
MX record will differ depending on your selected sending region.
Do not use the same priority for multiple MX records. If Priority
10 is
already in use, try a higher value such as 20 or 30.Receiving Emails
If you want to receive emails at your domain, toggle the “Receiving” switch on the domain details page.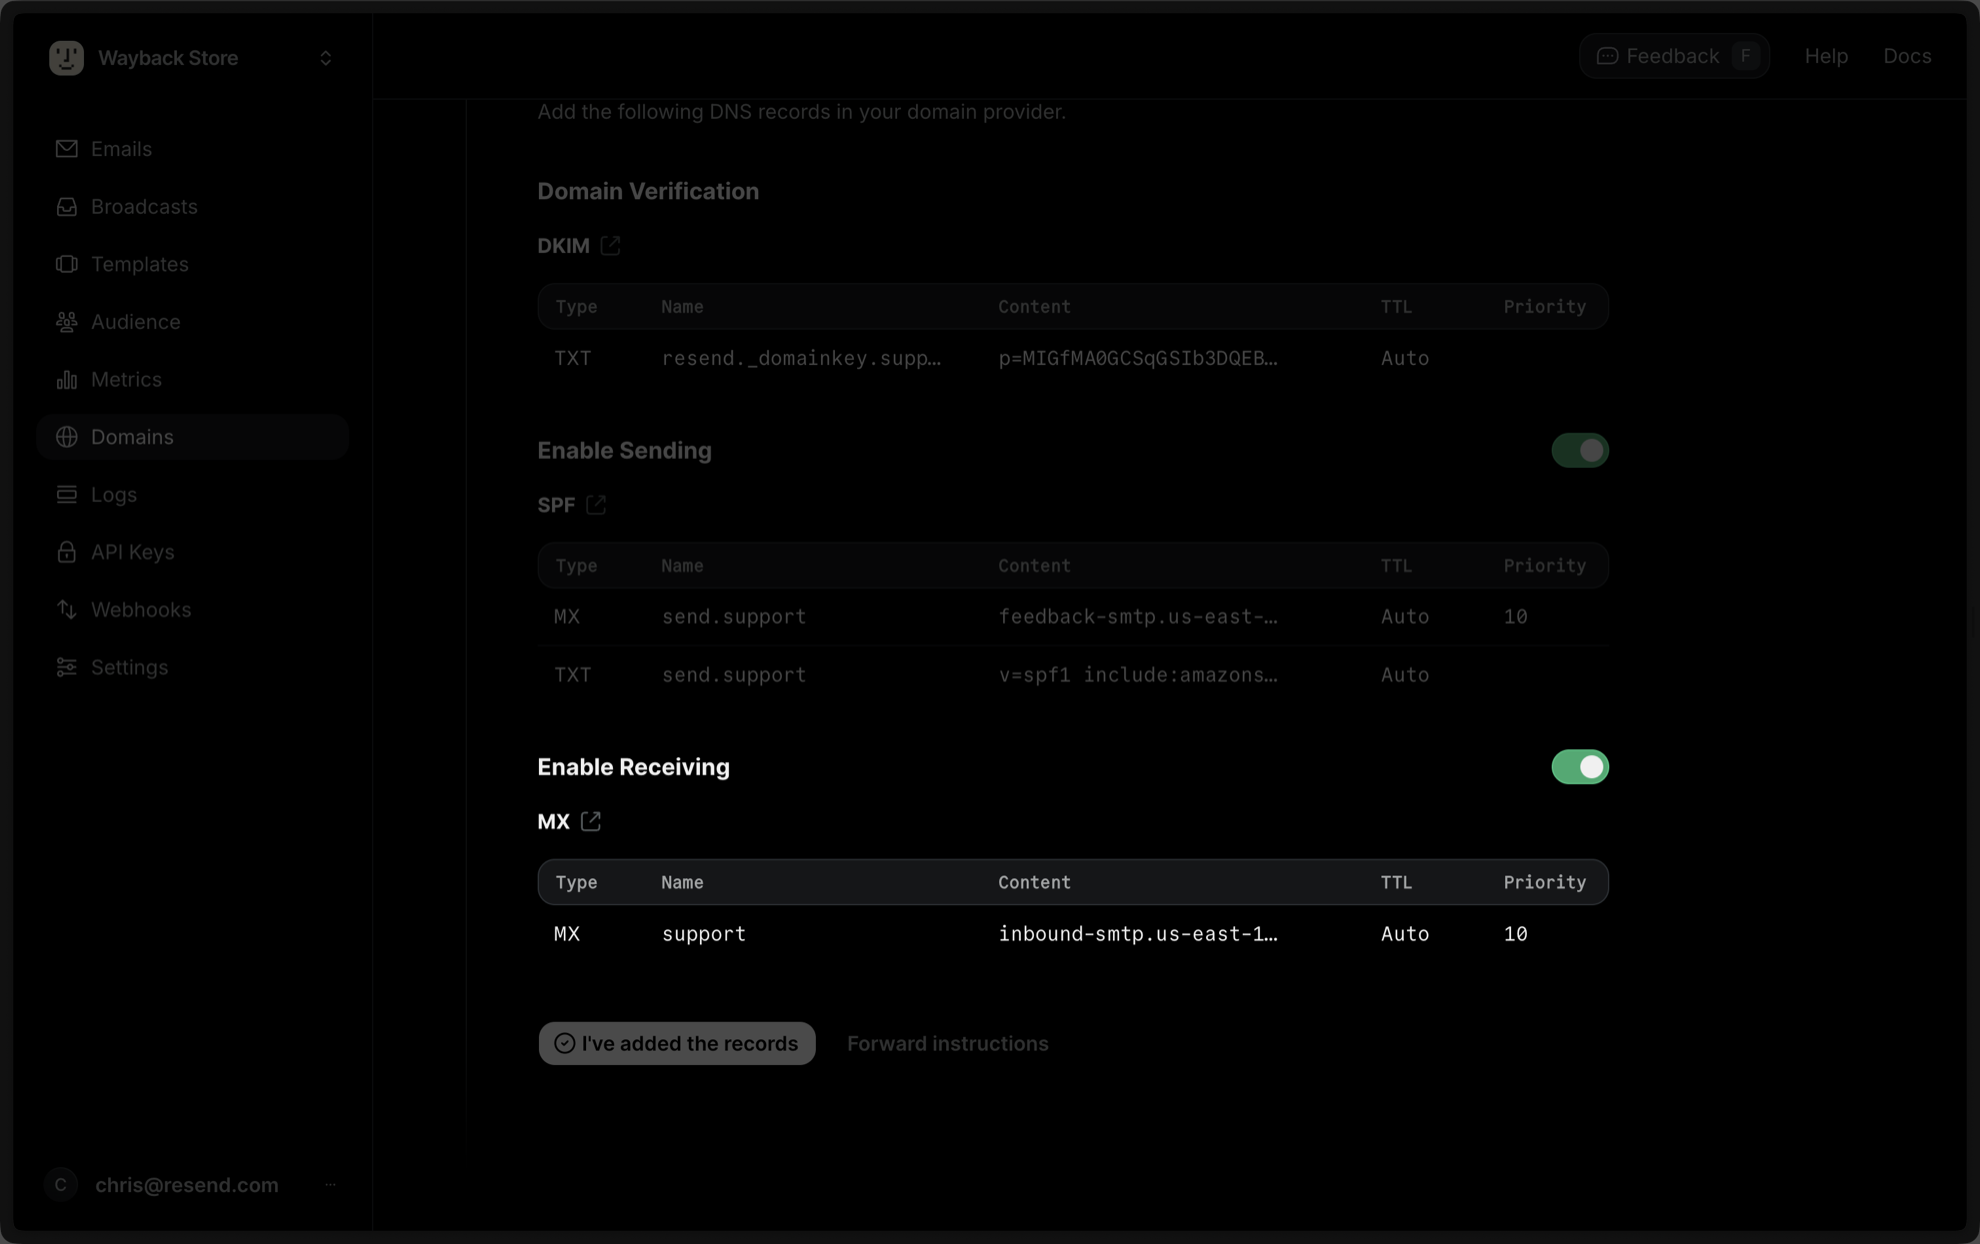
- Click the Add Record button.
- Hover over the MX Record section and click ADD.
- Enter
inbound(or your receiving subdomain) in the Host field. - Copy the MX Value from Resend into the Points to field.
- Enter
10for Priority. - Click Add Record to save.
After verifying your domain, create a webhook to process incoming emails. For help setting up a webhook, how to access email data and attachments, forward emails, and more, see our guide on receiving emails with Resend.
Complete Verification
Now click Verify DNS Records on your Domain in Resend. It may take up to 72 hours to complete the verification process (often much faster). DNS updates at DreamHost can take several hours to propagate.Troubleshooting
If your domain is not successfully verified, these are some common troubleshooting methods.Resend shows my domain verification failed.
Resend shows my domain verification failed.
Review the records you added to DreamHost to rule out copy and paste errors.
Ensure the Host field uses only the subdomain (e.g.,
send or
resend._domainkey) and that you did not include the full domain name.It has been longer than 72 hours and my domain is still Pending.
It has been longer than 72 hours and my domain is still Pending.