

Requirements
- SSO is available as an add-on on Scale plans, and included on Enterprise plans. See pricing for details.
- You must be an Admin of the team.
- Your own email address must be on the domain you want to use for SSO. For example, to set up SSO for
acme.com, you must be signed in asyou@acme.com.
Set up SSO
1
Start the setup from Team Settings
Navigate to your Team Settings and click Enable SSO.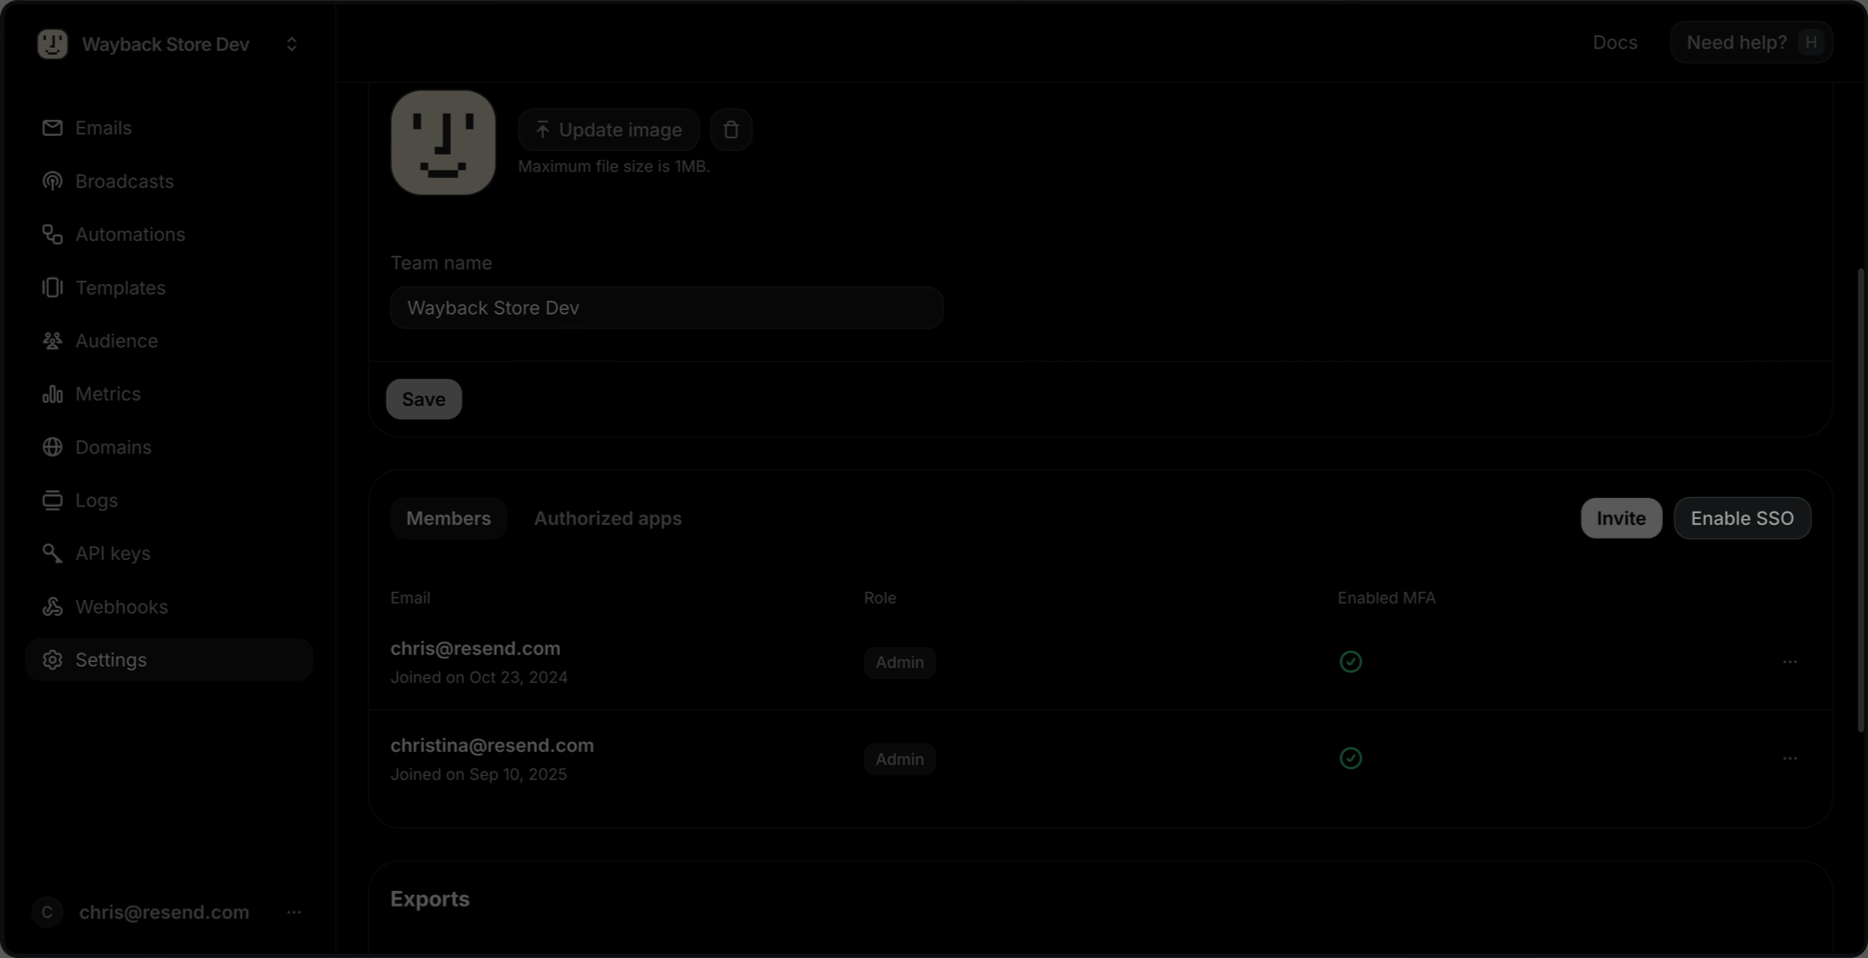
If you are on a Scale plan and don’t see the option to enable SSO, add the SSO
add-on from your Usage page first.
2
Enter your organization domain
This is the email domain your team members use to log in. It doesn’t have to match the domains you use to send or receive email.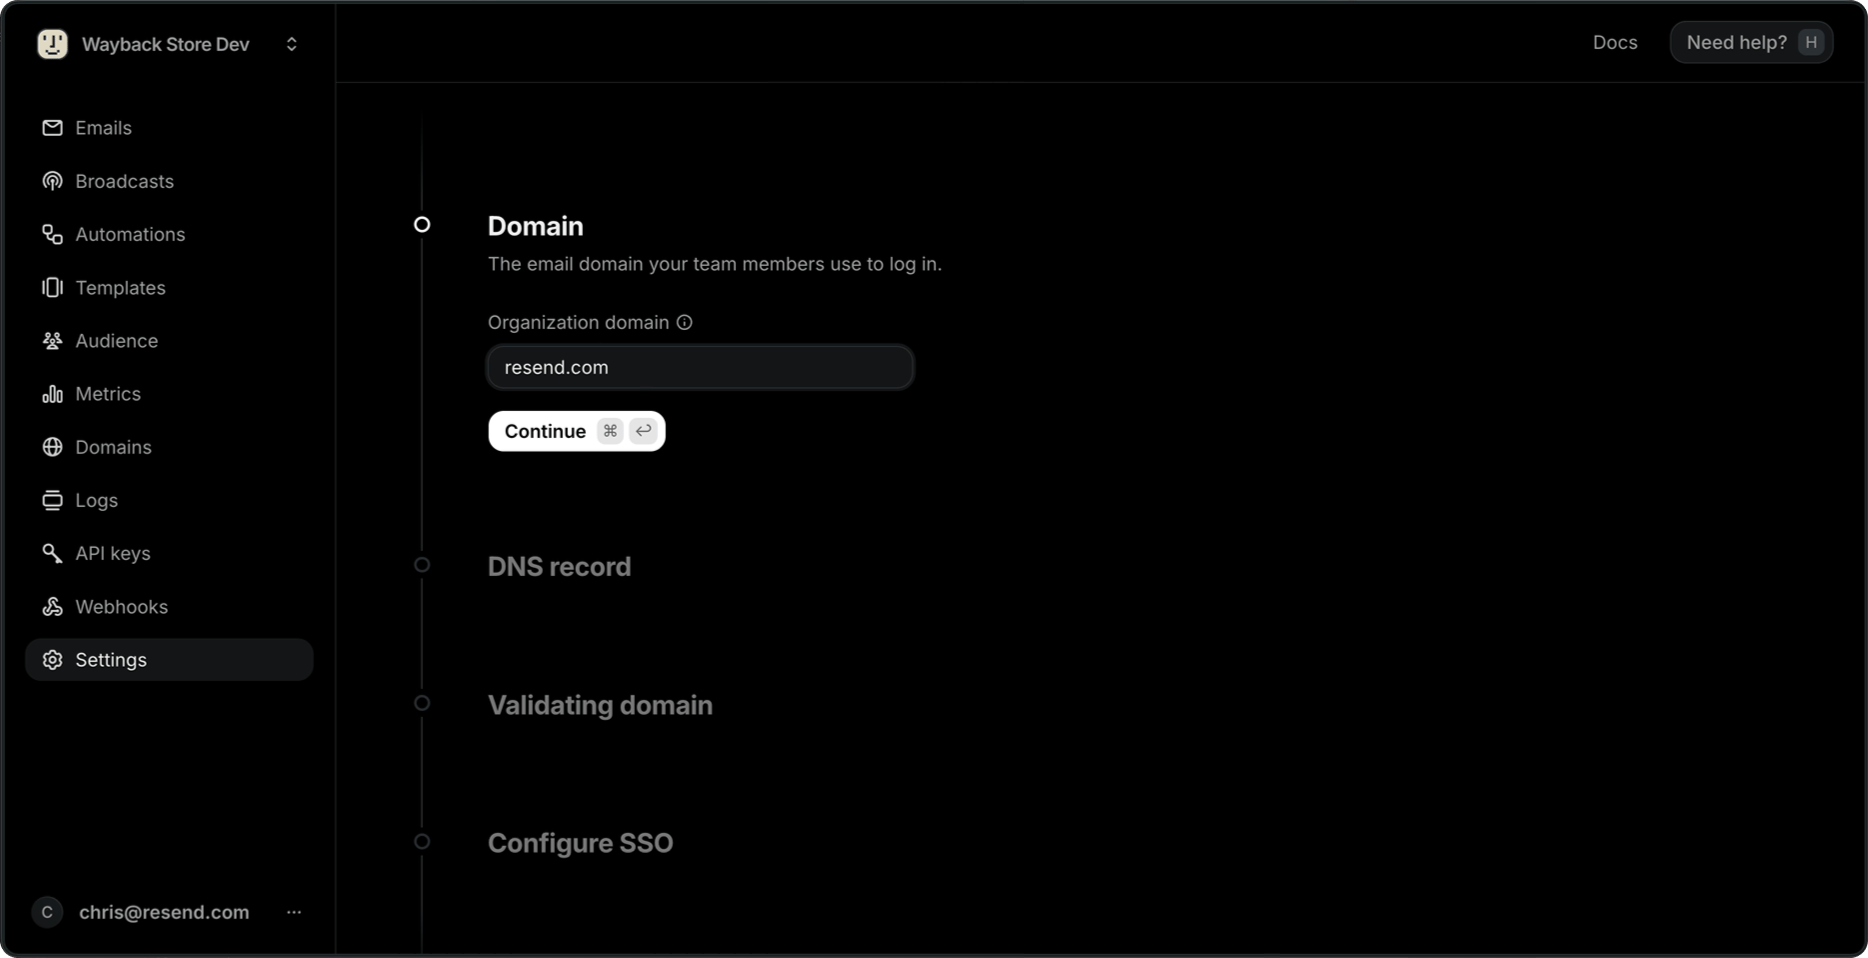
3
Add the TXT record to your DNS
Resend issues a 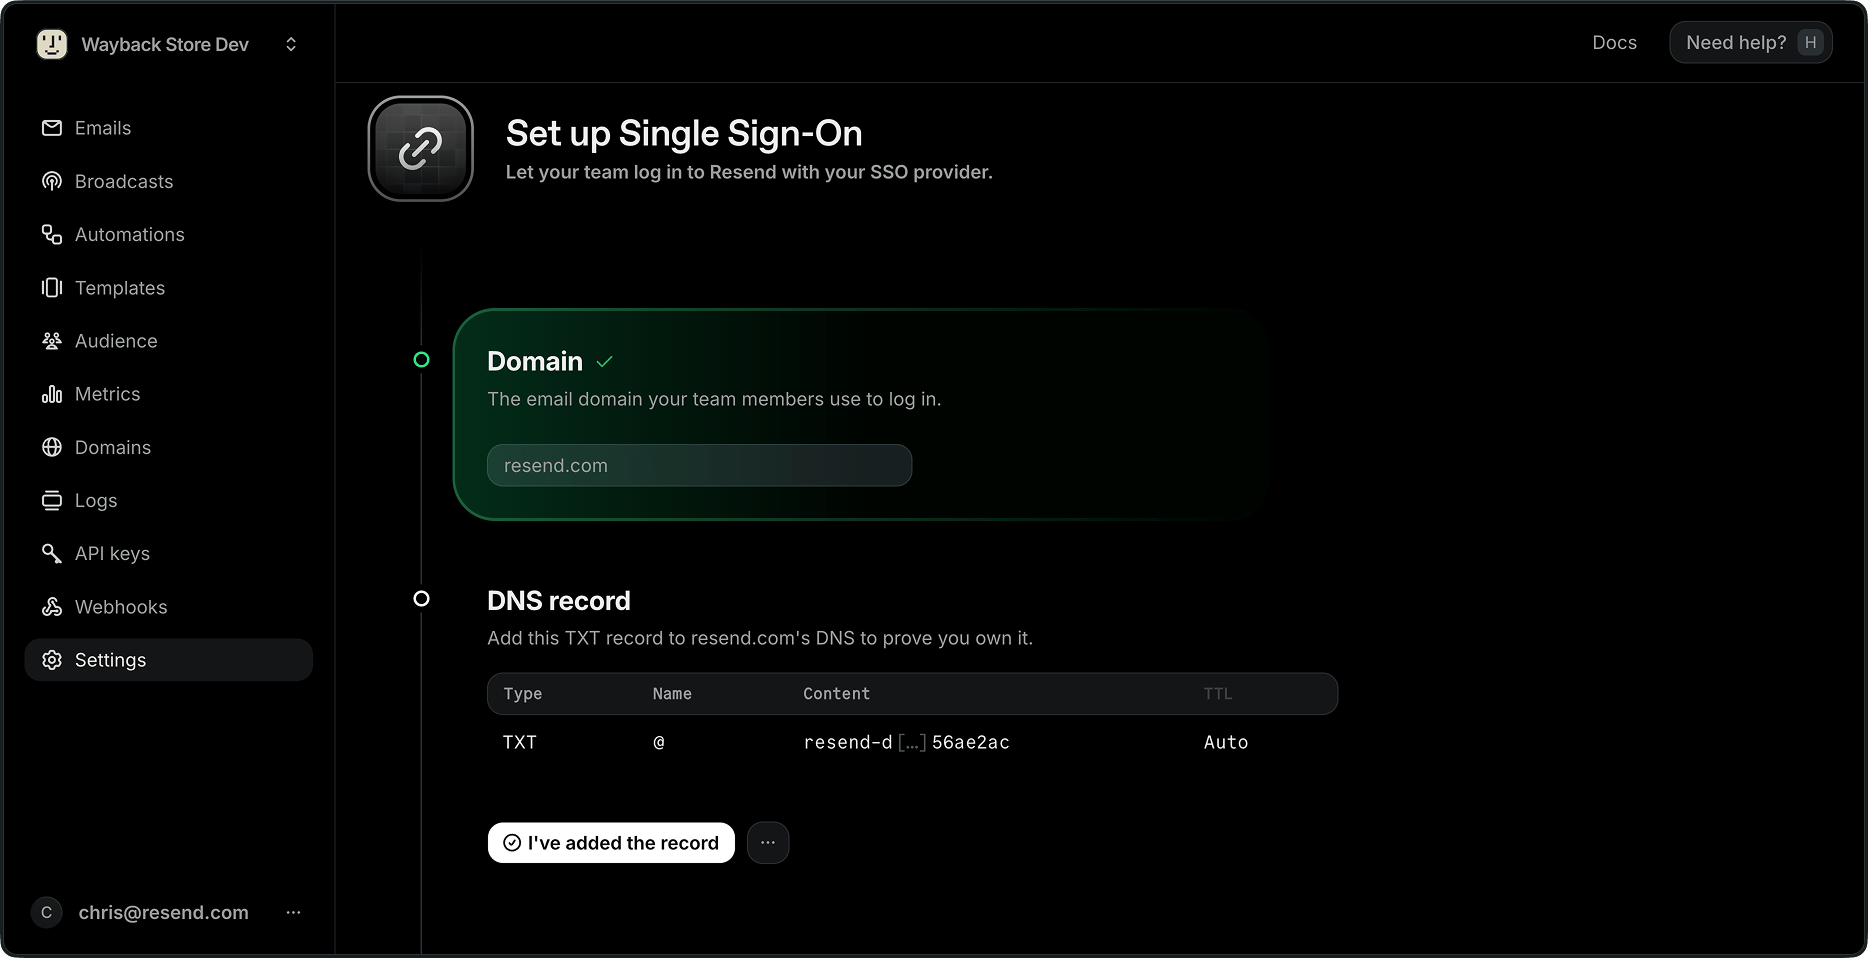
TXT record that proves you own the domain. Add it at the apex of your domain:Copy the value from the Dashboard rather than typing it, since it’s unique to your domain.
4
Wait for verification
Click I’ve added the record. Resend checks your DNS repeatedly for up to an hour and updates the page as it goes. DNS changes usually propagate within a few minutes.
5
Connect your identity provider
Once the domain is verified, click Finish setup. A new tab opens where you configure the connection to your identity provider.When you return to Resend, the Single Sign-On section of your Team Settings shows SSO as enabled.
Sign in with SSO
Team members sign in at resend.com/login:- They enter their email address.
- If their domain has SSO configured, they’re offered Continue with SSO.
- They authenticate with your identity provider and land in the team.
Enforce SSO
By default, members can still sign in with a password, Google, or GitHub. Turn on Enforce SSO in the Single Sign-On section of your Team Settings to require SSO instead. When enforcement is on, anyone whose email address is on your SSO domain is redirected to your identity provider, including attempts to sign in with a password, Google, or GitHub. Only Admins can change this setting.Restrict joining other teams
Resend can also prevent accounts on your SSO domain from taking your organization’s identity into unrelated teams. When this restriction is enabled, accounts on your SSO domain can’t:- create new teams
- be invited to, or accept invitations from, teams outside your SSO organization
Disable SSO
- Navigate to your Team Settings.
- In the Single Sign-On section, toggle Disable SSO.
- Type
DISABLE SSOto confirm.
The SSO domain can’t be edited after setup. To use a different domain, disable
SSO and set it up again.
Troubleshooting
“We couldn’t find the TXT record” The record isn’t visible to Resend yet. Confirm it was added at the apex of the domain (@, not a subdomain), then click I’ve added the record to check again. Some DNS providers take longer than a few minutes to propagate.
“We found a TXT record, but its value doesn’t match”
There’s a resend-domain-verification record on the domain with a different value, usually left over from an earlier setup. Replace its content with the value shown in the Dashboard and verify again.
Verification stopped without finishing
Resend stops checking after an hour. Fix the record, then start a new check with I’ve added the record.
Setup shows as unfinished
The identity provider connection was never completed. Open Team Settings, click Continue SSO setup, and finish the last step.
A member isn’t offered “Continue with SSO”
Their email domain must match your verified SSO domain, and the setup must be complete. Confirm SSO shows as enabled in Team Settings.
Non-admins can’t change SSO settings
Members can see the team’s SSO configuration, but only Admins can set it up, enforce it, or disable it.
If you’re still stuck, contact support.